Ads
Videos
Banner
Interstitial
The Library supports the following Ads networks :
- IronSource (Include Facebook, Admob, AdColony, Applovin, Chartboost, Unityads, Vungle, Tapjoy, Amazon)
- TapDaq (Include AdMob, AppLovin, InMobi, IronSource, Maio, UnityAds, AdColony, Facebook, Pangle, Tapjoy, Vungle)
- Home Ads
- Admob
- StartApp
- Unity3d
The library will switch between chosen networks when displaying ads.
Common props
- isDirect : If you want to call it directly and control all behaviors, set the isDirect to true.
- ViewGroup : The view where you want to insert the banner
-
position : The order where you want to insert the banner in the specified ViewGroup.
-
The GoRewardListener has two methods :
-
onRewarded(int rewardItem) : with the rewarded value.
-
onRewardedFailed(int arg)
-
Test
AdMod Network
We take for example AdMod Network.
-
Please go to this link -> https://developers.google.com/admob/android/test-ads#enable_test_devices
-
Copy the Id of the Ads that you want : Banner, Interstitial, Rewarded Video...
-
Paste it on goconsole application.

Note: Don't forget to activate the network on goconsole platform.

StartApp
Unity3D
Mailforms
Ads
Note : In the application listing, you can declare up to 6 unit Ids sparated by ;
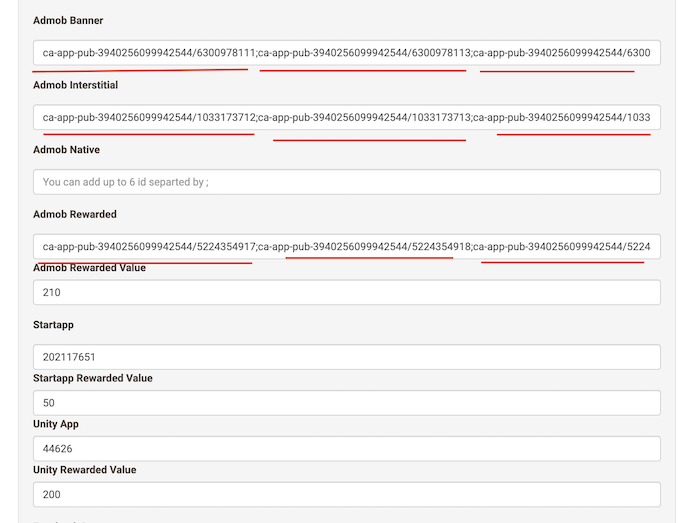
In every call to a type of ads, you can specify the emplacement you want to use, for example, show me interstitial for the second unit id :
GooConsole.interstitial(this, 2);
Please Go here Ads for further details.
Ads Zone
You can create an infinity of zones, you must use the same Zone Name in your App source code to get the Ad for this zone.
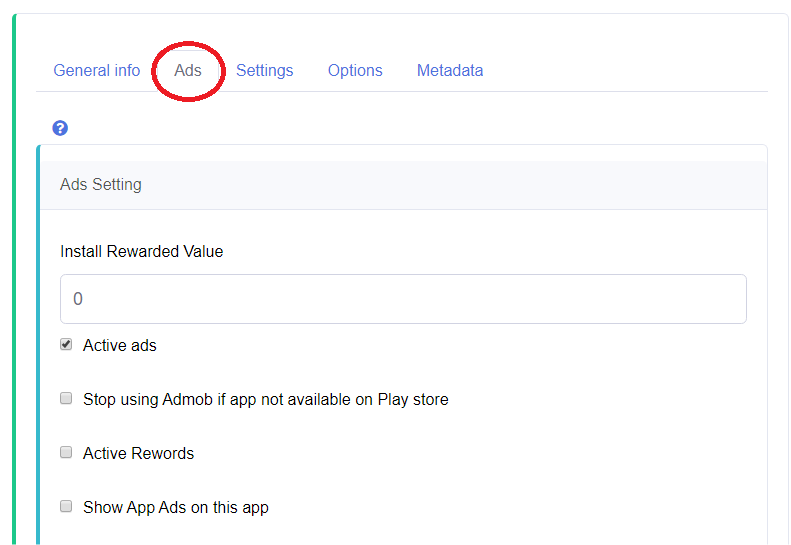
Go to your goconsole application and click on 'Ads option'.
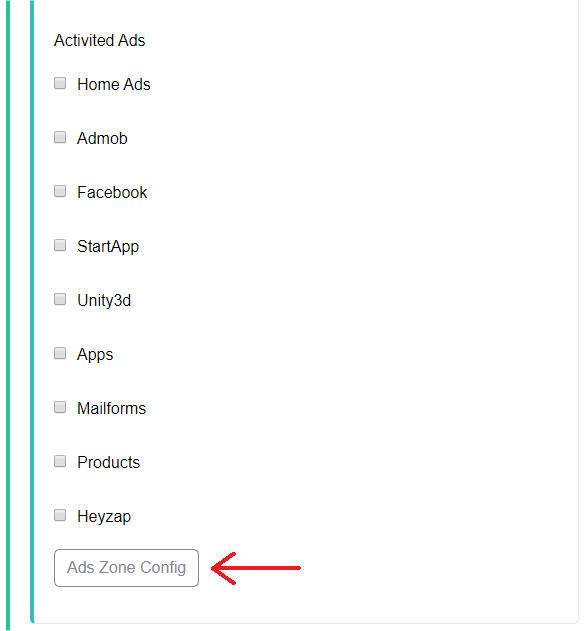
And scroll down to "Ads Zone Config" button, click on it.
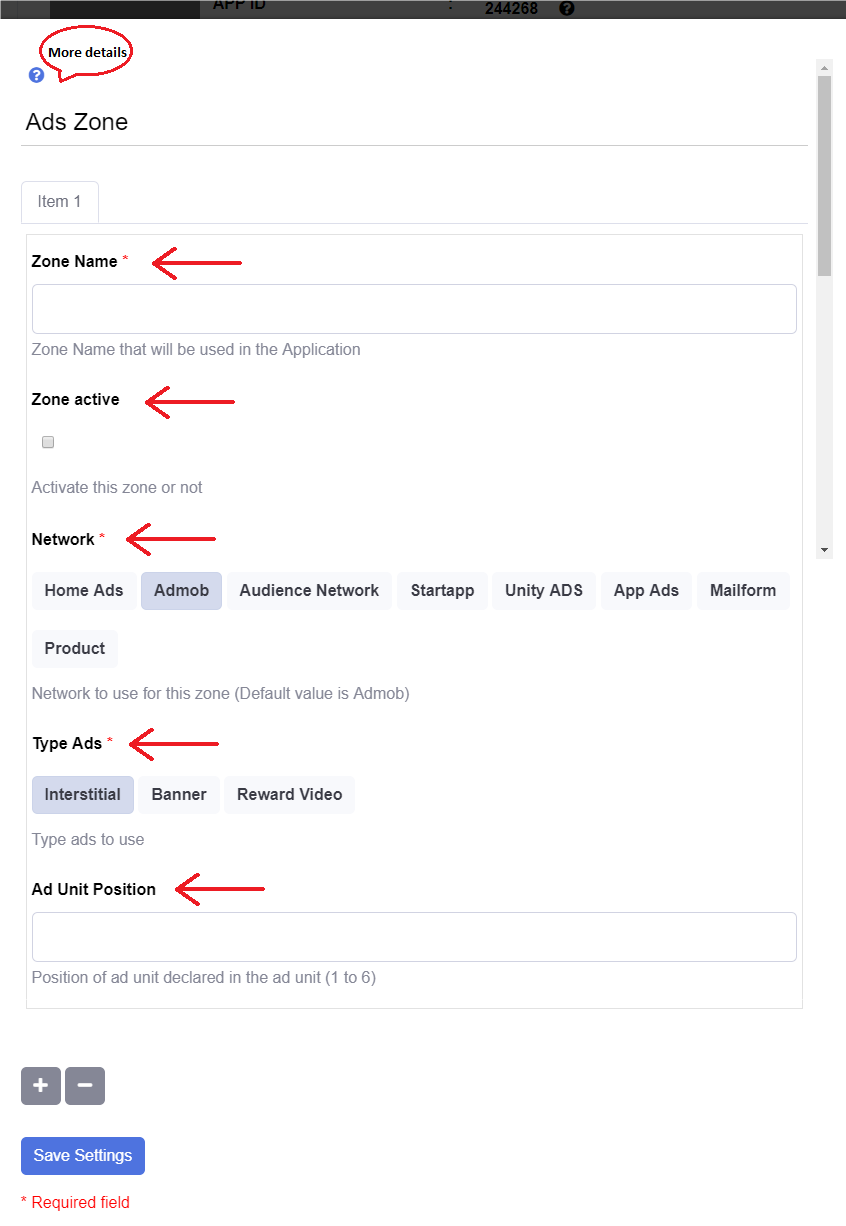
If you want to add a new Ads Zone click on the symbol " + " , then fill this fields :
-
Zone Name : This Name will be used in your application source code, it must be unique for the same network and Ads Type. This field is required.
-
Zone active : If this checkbox is true, it means that your Ads zone is active and appears on your application.
-
Network : Choose one of this networks, if you don't set it, by default it takes: ' AdMob'. This field is required.
-
Type Ads : Choose one of this type, this field is required.
-
Ad Unit Position : If you have declared more than one in your network unit Ids,put the position of your Ads unit Id. Otherwise, if you don't set it ,the system takes a random positions.
- To submit your modification click on 'save settings'.
- To delete the zone click on the symbol ' - '.
How the use Ads Zone inside your source code.
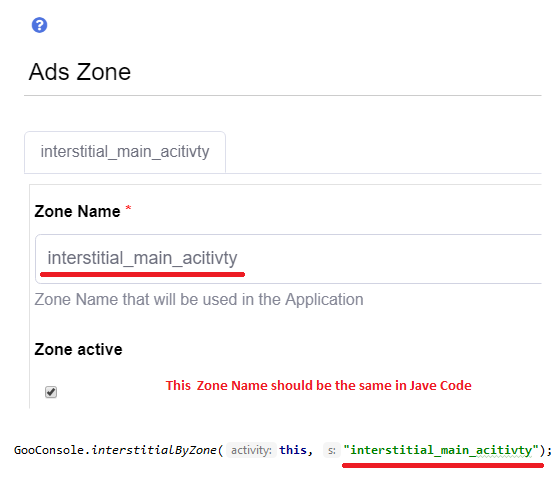
Interstitial
If you want to use the interstitial, call one of these following methods :
public static void interstitial(Activity activity)

public static void interstitialByZone(Activity activity, String zoneName)
Banners
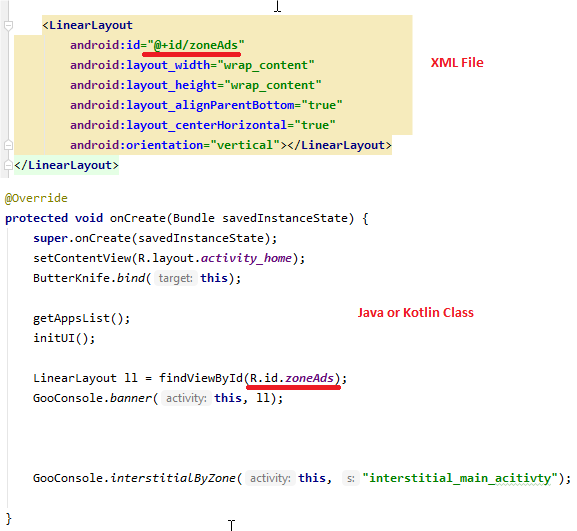
  public static void banner(final Activity activity, final ViewGroup viewGroup)

  public static void banner(final Activity activity, final ViewGroup viewGroup, final int position)

  public static void banner(final Activity activity, final ViewGroup viewGroup, String zone)

  public static void banner(final Activity activity, final ViewGroup viewGroup, final int position, String zone)
To use this type of Ads, you have to create a LinearLayout in your XML file and call goconsole.banner in your java or kotlin Code.
Rewarded Videos
To use this type of Ads, you have to call this method in your java or kotlin Code :
public static void RewardedVideoAds(Activity activity, boolean isDirect, GoRewardListener rewardListener)

Home Ads
In this part, you can create the Ads for any service you want. The type of these Ads can be banner, interstitial, Rewarded ads or Wall ads. About these types:
- Banner : The Ad can appear as a text or image.
-
Interstitial : The Ad appears as an image. the characteristics of this image are:
- Dimension : width (min 480 max 700) x height (min 320 max 600). - Max size : 500Ko. - Extension: png, jpg or jpeg. -
Rewarded ads: you reward the user by let him :
- Do an action (CPA action) - Install an App - Watch a video( for a giving time ) - Visit a website ( for a giving time) -
Wall ads: List of offers that user can just consult , like affiliates offers, he will not be rewarded for it.
## Products Ads
Create your products on : GoConsole => Shopping=> Products. - Activate products Ads on "Ads option". - Go to " Settings" then activate "Use product shopping" option.
## CPA
GoConsole gives you the possibility to add automatically CPA offers.
Go to GOCONSOLE -> Global Setting and fill these fields:
- CPALEAD Offers:
        - Cpalead id
        - Cpalead point ratio
        - Cpalead min amount
        - Cpalead link landing

- CPARIP Offers:
        - Cpagrip user id
        - Cpagrip key
        - Cpagrip point ratio
        - Cpagrip min amount
        - Cpagrip landing link

- MOBIDEA Offers:
        - Mobidea login
        - Mobidea password
        - Mobidea point ratio
        - Mobidea min amount
        - Mobidea landing link
Use CPA offers to reward your users.
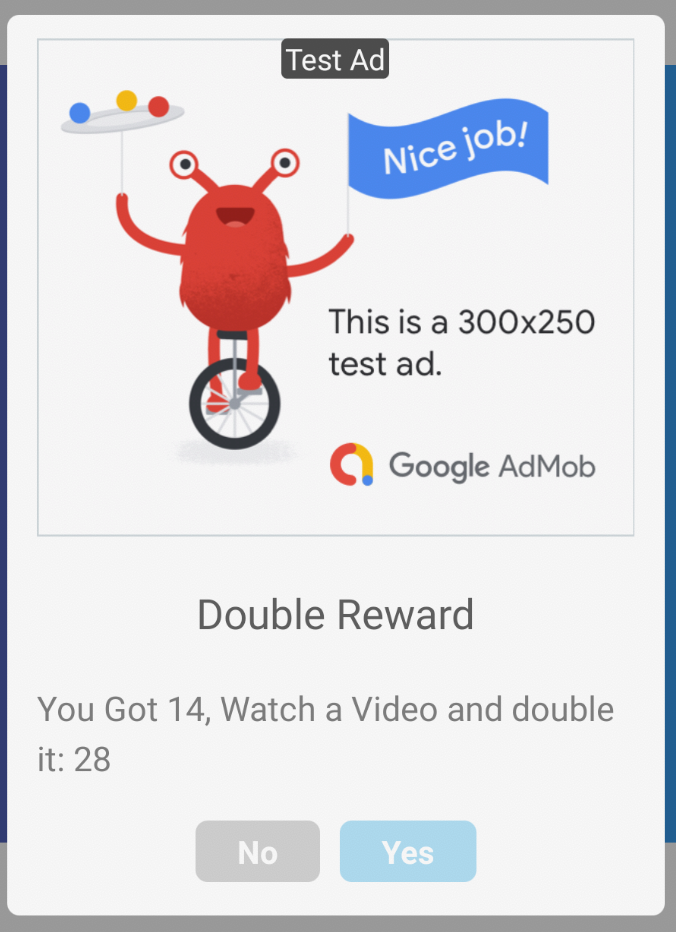
Ads on dialog
app-ads.txt and App Website
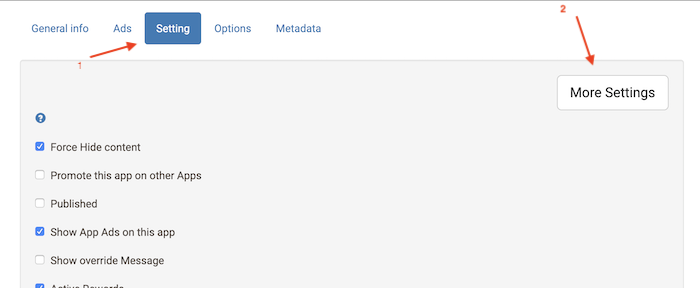
If you want to create your app website and generate the app-ads.txt, Go to your app listing, select Settings and click on more Settings.
Get a page for your app
You can Create a snippet html to display more details about your application.
Select the Common config, and update 'Website index template' with the content that you want.
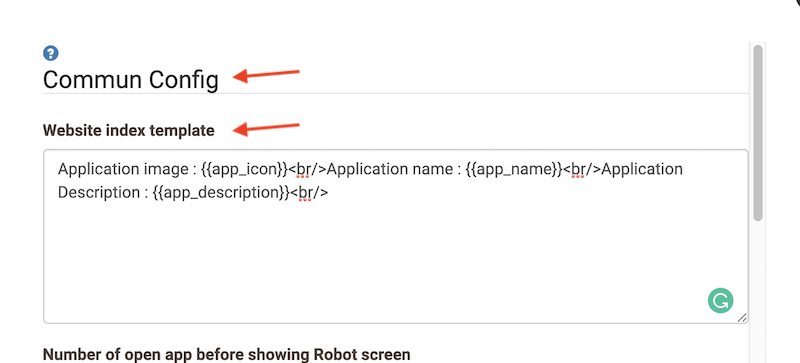
Use this variable to update it :
-
{{app_icon}} : Application Icon
-
{{app_name}} : Application name
-
{{app_description}} : Application Description
Example :
Application image : {{app_icon}}
<br/>
Application name : {{app_name}}
<br/>
Application Description : {{app_description}}
<br/>
And click on Save.
Generate app-ads.txt file
Select the Common config, and update 'app-ads.txt content' with the content that you want.
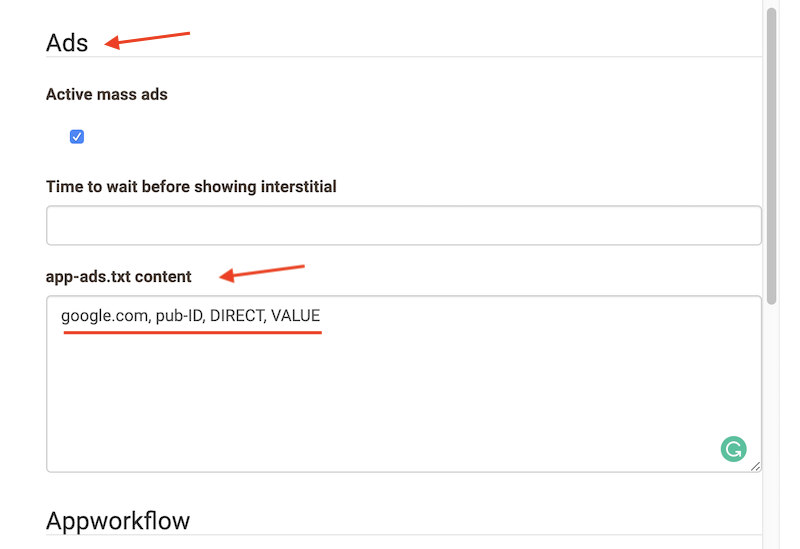
And put the content that you want for all your ads providers.