GoConsole Android Application Access System
In this part, we will explain to you the overall functioning of this platform.
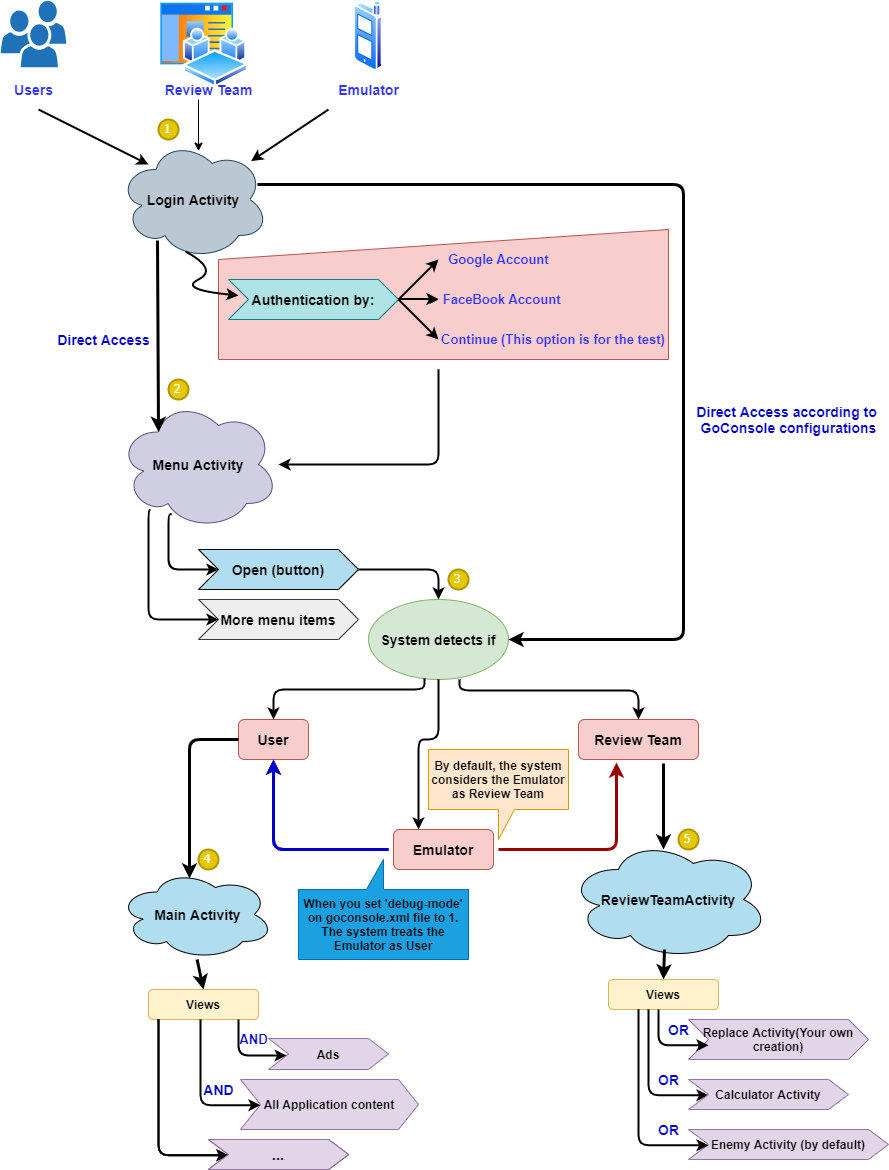
This following architecture is a MindMap Model.

As you see, there is 3 actors : User, Review Team and Emulator.
Step 1: Login Activity
All of these actors can login to "Login Activity" by:
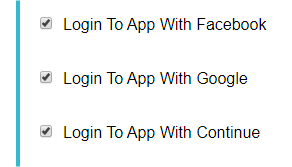
Authentication by using: - Google account; - Facebook account; - Continue (It's an option that let you access directly to the app, it is used for the test);
Note: you have to activate these options on GoConsole.

Step 2: Menu Activity
If you don't activate any of the authentication's options on GoConsole, the 'Menu Activity' will be opened.
Note: If you make 'On' the "Menu Activity" checkbox on GoConsole, it means you force it to appear on the app. That's why it appears in the second step.
Then you click on "Open" button.
Step 3: Detection System
The system detects automatically if you are a User or a Review Team or an Emulator.
Step 4: Main Activity
If you are a User you will access to the "Main Activity". In this view you will see: - Ads - All the content of the app - more options...
Step 5: ReviewTeamActivity
If you are a Review Team you will access to the "ReviewTeam Activity". This activity contains 3 views: - Replace Activity (by your creation, with your own style). - Calculator Activity (it already exists on GoConsole). - Enemy Activity (it already exists on GoConsole).
You have to choose which one do you want Review Team to see. In case you didn't choose any of these activities, the system seeks for Calculator Activity first then Enemy Activity.
Note : The system treats you as User or Review Team depending on your 'debug-mode' value.
If 'debug-mode' is 0 on 'goconsole.xml' file, the Emulator is considered as Review Team. Otherwise, for the test you have to set it to 1.
Otherwise, if all above 'LoginActivity' options are 'Off' and the 'MenuActivity' option is also 'Off'. It leads you to Step(3)...